Cross experimental steps for LCD screen flickering and non display of flicker

Encountering LCD screen display issues such as flickering, flickering, or not displaying, I want to determine the fault point through cross testing
Cross experimental steps and precautions for LCD screen flickering and non display of flicker
Encountering LCD screen display issues such as flickering, flickering, or not displaying, I want to determine the fault point through cross testing.
First, recall the basic principles of cross testing. In fact, it is the replacement method, which involves replacing suspicious components one by one with normal ones and observing the changes in faults. The core lies in controlling variables, changing only one component at a time. Attention should be paid to safety, power-off operation, and anti-
static measures are also important.
Next, organize the testing steps. It should go from simple to complex, starting with external devices and then internal components. For example, starting with the signal source and cable, replace the HDMI cable or connect with other devices to eliminate external issues. Then enter the device itself and divide it into several main modules: motherboard, screen, screen cable, power supply, backlight, etc.
The following are the detailed steps and precautions for conducting LCD screen fault cross testing:
Core principles:
1. Replace only one component at a time: This is the most crucial principle! Replace only one component at a time and then test. If multiple components are replaced simultaneously, even if the fault disappears, it is impossible to determine which component is causing it.
2. Carefully record: Record in detail the components replaced each time, the fault phenomena before replacement, and the changes in phenomena after replacement.
3. Use "known normal" components: The components used for replacement must ensure that they are functioning properly, otherwise the test results will be invalid.
4. Safety first: Before operation, be sure to disconnect the power supply of the device (unplug the power cord) and release your own static electricity (touch grounded metal objects or wear anti-static wristbands).
Cross test steps (from easy to difficult, from outside to inside)
1. Exclude external factors:
Cross testing of signal sources:
Replace different input sources (such as switching from HDMI1 to HDMI2, DP, VGA, etc.).
Replace different signal source devices (such as testing with another computer, game console, Blu ray player).
Replace different signal cables (HDMI cable, DP cable, VGA cable, etc.).
Purpose: To eliminate problems with signal source equipment or cables themselves.
Power Cross Test:
If the device uses an external power adapter, try replacing it with a confirmed normal adapter of the same specifications.
Purpose: To eliminate problems caused by unstable or damaged power supply of the power adapter (such as screen flickering, intermittent black screen).
2. Cross testing of internal components of the device:
prepare
power failure! Ensure that the device is completely powered off.
Disassembly: Follow the disassembly guide of the device (monitor, laptop, TV) carefully to disassemble the outer shell, exposing the internal components (motherboard, power board, logic board/driver board, backlight board, screen cable, screen itself). Pay attention to the screw position and buckle.
Anti static: Continuously pay attention to anti-static measures during operation.
Observation: Visually inspect the interior for obvious burn marks, capacitor bulges, component detachment, loose or corroded connectors, creased or damaged screen wires.
Motherboard cross testing:
If conditions permit (there is another device of the same model or compatible model), remove the motherboard (logic board/driver board) of the faulty device and install it onto a confirmed normal device of the same model. Observe whether normal equipment has the same malfunction.
(Suitable for laptops) External monitor test: Connect the laptop to a confirmed normal monitor/TV. If the external display is normal, then the output signal of the laptop motherboard (mainly the graphics card part) is normal, and the problem is likely to be in the screen, screen cable, or backlight part.
Purpose: To determine whether the motherboard (especially the signal processing and LVDS/eDP signal output parts) is functioning properly.
Screen line crossing test:
This is a very common fault point. Find the flexible flat cable (screen cable) that connects the motherboard and screen.
Carefully disconnect the connectors at both ends of the screen cable (motherboard end and screen end). Pay attention to the buckle method (flipping up, sliding sideways, etc.) and do not forcefully pull it out.
Replace with a screen cable that has been confirmed to be normal and matches the model perfectly. Reconnect both ends.
If a replacement cable cannot be found, you can try carefully unplugging the original screen cable several times (poor contact with the gold finger is a common problem), ensuring that it is fully inserted and the buckle is locked. You can also clean the golden fingers (gently wipe with an eraser, and then brush off debris with a brush).
Purpose: To determine whether the screen cable has poor contact, open circuit, or damage.
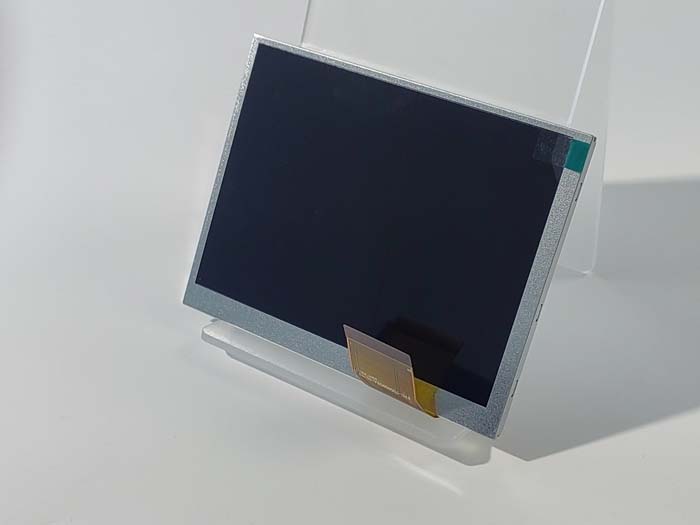
Screen Cross Test:
This is the most direct test, but usually the most difficult (requiring spare parts).
Remove the screen assembly of the faulty device.
Install a confirmed normal and fully compatible screen assembly onto the faulty device.
Purpose: To directly determine whether the screen panel itself (LCD layer, TFT driver circuit, Tab Bonding, etc.) is damaged. If the display is normal after replacing the screen, then the original screen is faulty.
Backlight module/backlight board cross test:
Symptom assessment: This test is aimed at faults such as "there is an image but it is very dark (visible under strong light)" or "the screen flashes briefly when turned on and then goes black but there is a faint image".
(Side entry backlight) mainly checks the light strip. Find and remove the light strip (usually located within the screen frame), and replace it with a confirmed normal light strip of the same model. Need some dismantling skills.
(Direct backlight) Check the light strip or CCFL tube (older equipment).
Backlight board: Remove the backlight board connected to the backlight module (light strip) and replace it with a confirmed normal backlight board of the same model.
Purpose: To determine whether the light strips, tubes, and backlight board (high-voltage board/constant current board) of the backlight system are faulty.
Cross testing of power board:
Remove the power board of the faulty device.
Install a power board that is confirmed to be normal and fully compatible with the model.
Purpose: To determine whether the power board is unable to provide stable voltage (especially to the motherboard and backlight), resulting in various display abnormalities or failure to power on. If the motherboard and power board are integrated, replace the entire integrated board.
3. Analysis results:
Analyze the fault points based on the changes in phenomena after each replacement test, combined with records.
For example:
After replacing the screen cable, the fault disappeared ->screen cable fault.
After replacing the screen, the fault disappeared ->Screen panel malfunction.
After replacing the motherboard, the normal device malfunctioned ->the original motherboard malfunctioned.
After replacing the backlight board, the backlight is normal ->Backlight board failure.
After replacing the light strip, the backlight is normal ->* * The light strip is faulty.
All key components (motherboard, screen cables, screen, power supply) have been replaced and tested, and the fault still persists ->requires further inspection (such as small components on the motherboard, software issues, compatibility issues), or the fault may be in the parts that have not been replaced (such as keypad, main control chip soldering issues).
Important Note
1. Model matching: The replacement component must be a completely identical or confirmed compatible component. The definition, voltage, and signal of screen cable interfaces for different models may vary, and forced use may damage equipment or new components. The interface (LVDS, eDP), resolution, number of screen pins, and voltage of the screen must be matched.
2. Caution in operation: Internal connectors are usually fragile, and screen cables are very thin and vulnerable. When operating, be gentle and avoid bending or pulling the screen cable. Ensure that the connector is properly plugged in and locked.
3. Electrostatic protection: The internal components of the LCD screen are very sensitive to static electricity! Be sure to take anti-static measures.
4. Risk awareness: Disassembling the device carries risks, which may result in equipment damage and loss of warranty. If unsure, it is recommended to seek help from professional maintenance personnel.
5. Definition of "known to be normal": A component used for replacement, preferably removed from a device of the same model that is functioning normally, or a newly purchased spare part. Testing with components from another 'possibly faulty' device yields unreliable results.
6. Comprehensive judgment: Cross testing is a powerful means, but sometimes it is necessary to combine it with a multimeter to measure voltage, resistance, etc. for further confirmation, especially for power supply and backlight drive issues.
Suggested sequence of summary steps:
External signal/cable/power testing ->disassembly inspection ->(laptop priority external display testing) ->screen cable re insertion/cleaning/replacement ->motherboard replacement ->backlight board/light strip replacement ->screen replacement ->power board replacement.
Finally, summarize the sequence of steps to provide users with a clear process. From the outside to the inside, from simple to complex, avoid dismantling the machine at the beginning. By systematically executing these cross testing steps, the hardware failure points of the vast majority of LCD screens can be effectively located. Wishing you success in finding the fault!